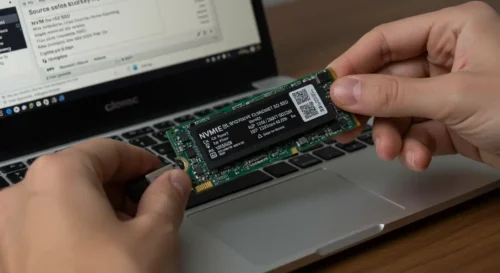
Cloning your NVMe M.2 SSD is a straightforward process that allows you to upgrade your storage solution without the hassle of reinstalling your operating system and applications. This guide provides a comprehensive walkthrough of how to clone your NVMe M.2 SSD, ensuring a smooth transition to your new drive. We’ll cover everything from the necessary tools and software to the step-by-step cloning procedure, along with helpful tips and troubleshooting advice. Whether you’re a seasoned PC builder or a novice user, this guide will empower you to clone your NVMe M.2 SSD with confidence.
Cloning Your NVMe M.2 SSD: A Comprehensive Guide
In today’s fast-paced digital world, upgrading your storage solutions is crucial for optimal system performance. Whether you’re seeking increased storage capacity or a significant speed boost, cloning your NVMe M.2 SSD offers a seamless transition. This guide will walk you through the process step-by-step, ensuring a smooth and successful upgrade.
Why Clone Your NVMe M.2 SSD?
Before we delve into the specifics of how to clone your m2 SSD, let’s understand the compelling reasons behind this process. Cloning your NVMe M.2 SSD provides several key advantages:
- Data Preservation: Cloning meticulously replicates your entire operating system, applications, and user data, preserving your system’s configuration exactly as it is. This means no more reinstalling operating systems, drivers, and countless applications – a time-consuming and error-prone process.
- Time-Saving: Reinstalling your operating system and all your applications from scratch can be incredibly time-consuming. Cloning eliminates this lengthy process, allowing you to quickly transition to your new SSD and get back to work or play without delay.
- Seamless Transition: Enjoy the benefits of your new SSD immediately without any disruption to your workflow. Whether it’s a faster boot time, quicker application launches, or smoother multitasking, you can experience the performance gains instantly.
- Reduced Risk of Errors: Manual system reinstallation can introduce errors or compatibility issues. Drivers might not install correctly, applications might encounter conflicts, and you might inadvertently lose crucial data. Cloning minimizes these risks by replicating your existing system flawlessly, reducing the chances of encountering such problems.
- Simplified Upgrades: Whether you’re upgrading to a larger capacity SSD to accommodate growing data needs or transitioning to a faster model for enhanced performance, cloning simplifies the entire upgrade process, making it a breeze for both novice and experienced users.
What You’ll Need:

Before embarking on your m2 SSD cloning journey, ensure you have the following:
- Source and Target NVMe M.2 SSDs:
- The source SSD is your current drive, containing your operating system, applications, and data.
- The target SSD is the new drive you’re upgrading to.
- Cloning Software: Reliable cloning software is paramount for a successful operation. Popular options include:
- Acronis True Image: A comprehensive and user-friendly solution with advanced features and excellent support.
- Macrium Reflect: A powerful and versatile tool known for its reliability and stability.
- Clonezilla: A free and open-source option that offers flexibility and advanced features for experienced users.
- Samsung Data Migration Tool: Specifically designed for Samsung SSDs, this tool provides a streamlined and user-friendly cloning experience.
- USB-to-M.2 Adapter or Enclosure (Optional): If your chosen cloning software requires external access to the new SSD, you’ll need a USB-to-M.2 adapter or enclosure to connect it to your computer.
- Backup: While cloning is generally safe, creating a backup of critical data is always recommended as a precautionary measure. This ensures that you have a safety net in case any unforeseen issues arise during the cloning process.
Step-by-Step Guide: How to Clone Your NVMe M.2 SSD

Now, let’s dive into the core of this guide: how to clone your m2 SSD step-by-step:
-
Prepare Your Target SSD:
- If you’re using an external adapter or enclosure, connect your new SSD to a USB port on your computer.
- Ensure the new SSD is properly formatted. Some cloning software may handle this automatically, but it’s best to check beforehand.
-
Install and Launch Cloning Software:
- Install the chosen cloning software on your computer.
- Launch the application and familiarize yourself with its interface.
-
Select Source and Target Drives:
- Within the cloning software, carefully select your source SSD (your current drive) and the target SSD (the new drive you’re upgrading to).
- Incorrect selection can lead to data loss, so double-check to ensure you’ve chosen the correct drives.
-
Configure Cloning Options: This step is crucial for a successful and optimized clone:
- Cloning Mode:
- Full Clone: Clones the entire contents of the source drive, including all partitions and hidden system files. This is generally recommended for most users.
- Partition Clone: Allows you to clone only specific partitions of the source drive. This option is useful if you want to clone only your system partition or specific data partitions.
- Alignment:
- Optimize the alignment of data on the target SSD for optimal performance. This ensures that data is written to the SSD in the most efficient way, leading to faster read/write speeds.
- Most modern cloning software automatically handles alignment, but it’s always a good practice to check and confirm this setting.
- Verification:
- Enable post-clone verification. This feature checks the integrity of the data on the target SSD after the cloning process is complete, ensuring that all data was transferred correctly.
- Cloning Mode:
-
Initiate the Clone:
- Once you’ve configured all the options, initiate the cloning process.
- Depending on the size of your source drive and the speed of your computer, the cloning process can take some time.
- Avoid interrupting the process, as it can lead to data corruption.
-
Verify the Clone:
- After the cloning process is complete, use the built-in verification tool within the cloning software to check for any errors or inconsistencies.
- Alternatively, you can manually check for data integrity by booting from the new SSD and verifying that all your applications and data are accessible and functioning correctly.
-
Swap SSDs (if necessary):
- If you were using an external adapter or enclosure, power down your computer.
- Carefully swap the old SSD with the new SSD in your computer’s M.2 slot.
- Ensure the new SSD is securely installed.
-
Boot Up and Test:
- Power on your computer and confirm that it boots successfully from the new SSD.
- Test all applications and functions to ensure everything works as expected.
- Check for any unexpected behavior or errors.
Tips and Considerations:
- Check SSD Compatibility: Ensure your new SSD is compatible with your motherboard and operating system. Refer to your motherboard’s manual and the SSD’s specifications to confirm compatibility.
- Shutdown Properly: Always shut down your computer properly before any hardware changes.
- Use a Stable Power Source: Power interruptions during the cloning process can lead to data corruption.
- Consider a Larger Capacity SSD: If possible, upgrade to an SSD with significantly more storage than your current one to accommodate future data growth. This will provide ample space for new applications, games, and media files.
- Update Drivers: After cloning, update your drivers, especially the chipset driver and any drivers specific to your new SSD. This ensures optimal performance and compatibility.
Troubleshooting and Common Issues:
- Cloning Process Fails: If the cloning process fails, try restarting the process. If the issue persists, check the cloning software’s documentation for troubleshooting tips.
- Boot Problems: If your computer fails to boot from the new SSD, try re-seating the SSD in the M.2 slot. If the issue persists, you might need to rebuild the boot information on the new SSD.
- Data Loss: If you experience data loss after cloning, check the integrity of the clone using the verification tools provided by the cloning software. If data loss is confirmed, restore your data from the backup you created before cloning.
FAQ: How to Clone Your m2 SSD
Can I clone my system to a smaller SSD?
No, you cannot clone to a smaller SSD as it would not have enough space to accommodate all your data.
What if the cloning process fails?
If the cloning process fails, you can usually retry. If the issue persists, consult the cloning software’s documentation or seek technical support from the software vendor.
Is cloning safe for my data?
Cloning is generally very safe, but it’s always recommended to have a backup of critical data before proceeding. This provides a safety net in case any unforeseen issues arise during the cloning process.
Can I clone my SSD to an HDD?
Yes, you can clone your SSD to an HDD, but the performance benefits will be significantly reduced. Cloning to an HDD is primarily useful for data backup and recovery purposes.
Do I need to defragment my SSD before cloning?
No, SSDs do not require defragmentation as they lack the physical limitations of traditional hard drives. Defragmentation can actually decrease SSD performance.
Disclaimer: This guide provides general information. Specific steps and options may vary depending on your cloning software and hardware configuration. Always refer to the official documentation for your specific software and hardware.


